
Learn more about how the Profile is the first step to getting started on Inphlu and how filling it out will give you more tools while using Inphlu.
Summary
The Profile tab contains a plethora of vital information that helps identify your account and gives you the ability to create contacts to share your content.
Overview

Your account information is stored in the Profile tab, along with your contacts and the ability to change your membership if you're the owner of your account.
The Profile tab consists of 5 different sections:
- Edit Profile
- Contacts
- My Teams
- Brands (if you're a Team user)
- Membership
Edit Profile
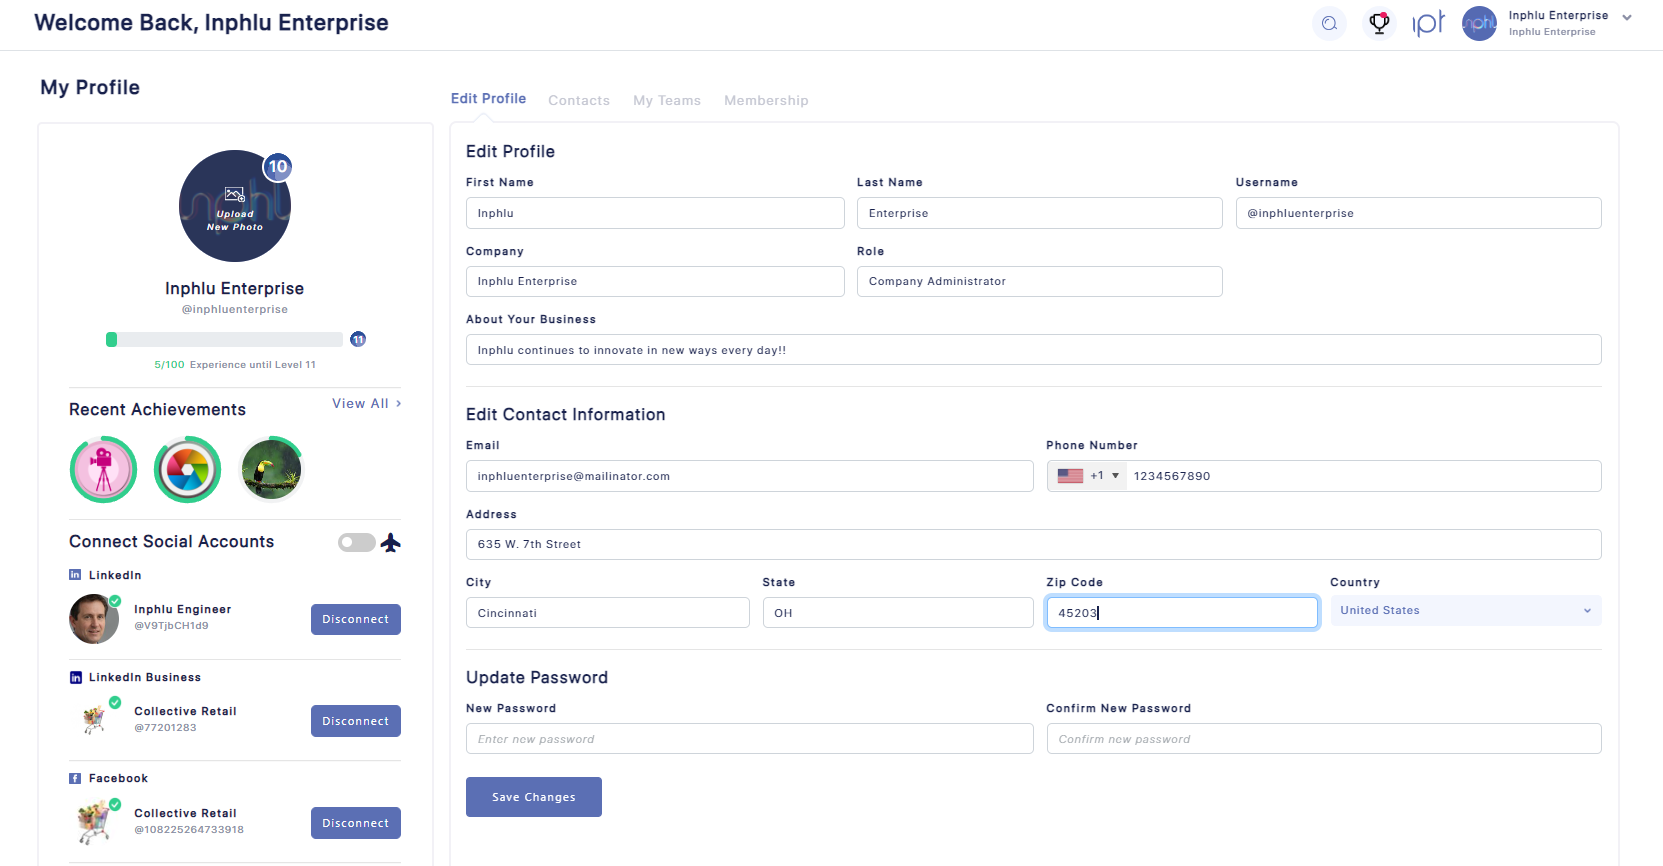
In the Edit Profile section of the Profile tab, you see your account's information, which you can edit and change if you see something inaccurate or no longer represents you. This includes your profile picture, social media accounts, profile information, and contact information. If you would like, you can create a new password for yourself by using the Update Password feature located at the bottom. Items like achievements and levels can also be found in your profile tab.
As mentioned previously, you can change which social media accounts your Inphlu account is connected to by clicking the Connect Account and Disconnect buttons. Currently, the only social media accounts available to connect to are a Facebook business account, LinkedIn business account, LinkedIn personal account, Twitter, and TikTok.
If you make any edits to your profile information, click the Save Changes button at the bottom to keep your changes!
If you're an Enterprise user, you may notice how there's an airplane icon and a switch next to the Connect Social Accounts section. If you toggle the switch on (if it's not already), you can have content shared with you to be automatically approved and published on your behalf. It's great if you know you want an online presence but don't always have the time to manage it!
Contacts
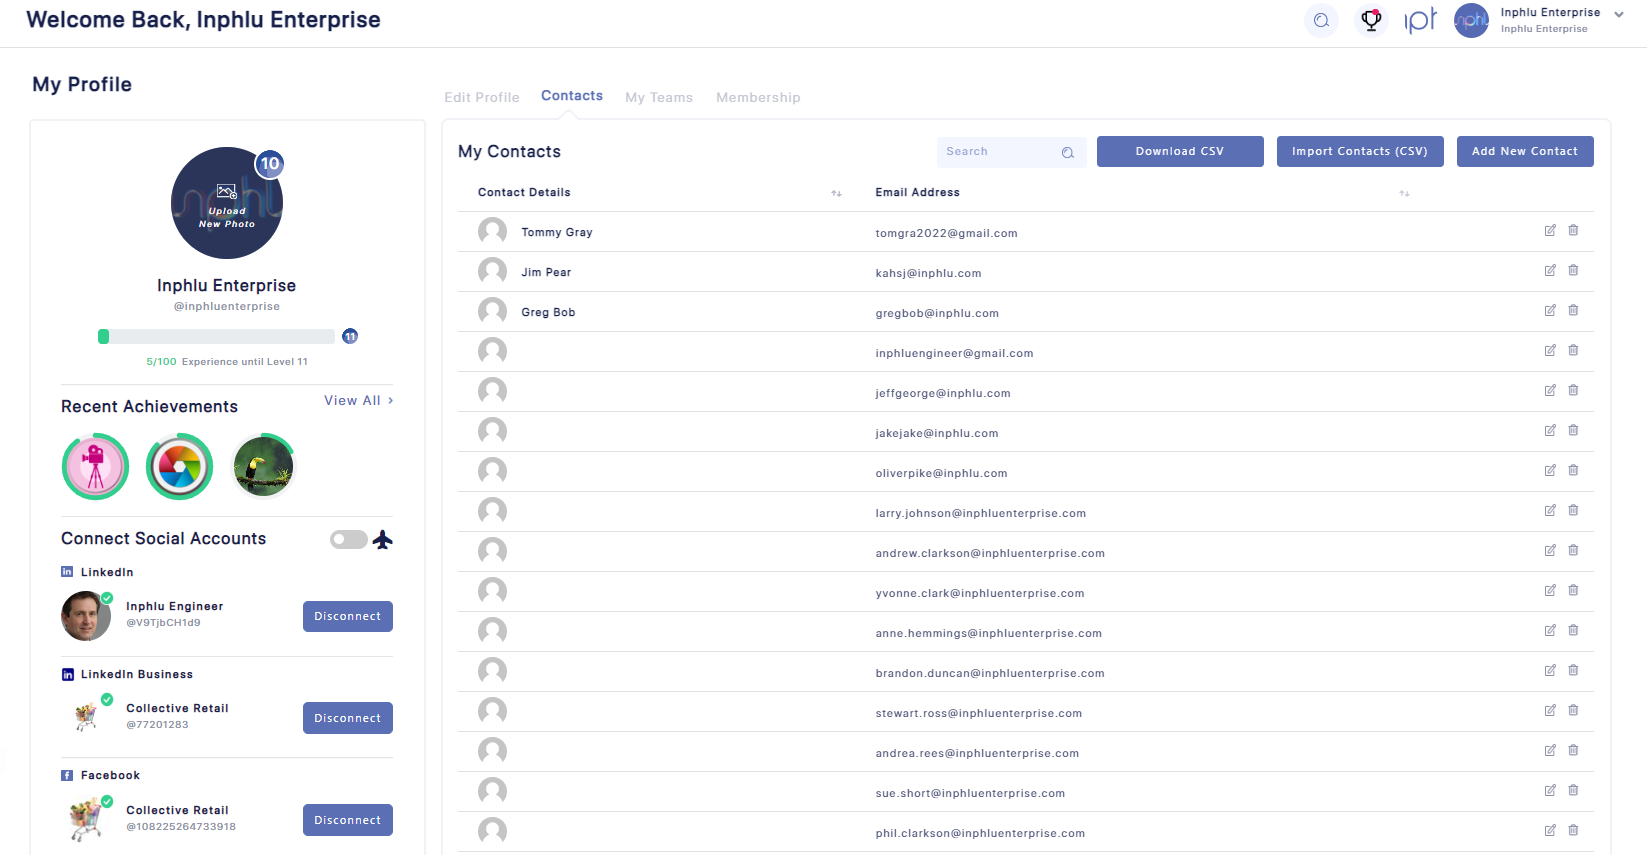
You can manage the people you've added to your account as contacts in the Contacts section. When a contact is added to your account, you can share the content you have created or generated with them more easily.
If you want to add a person as a new contact, click the Add New Contact button and fill out the person's name and email.
If you would like to add people to your contacts in bulk, you do so by downloading the sample CSV from the Download CSV button and replicating the format for the contacts you wish to add. Once you've added the people you would like as contacts in the CSV, import them using the Import Contacts (CSV) button and watch your contacts fill up!
Tip: If you would like to sort through your Contacts quickly, you can click the top of a column to help change the order.
My Teams
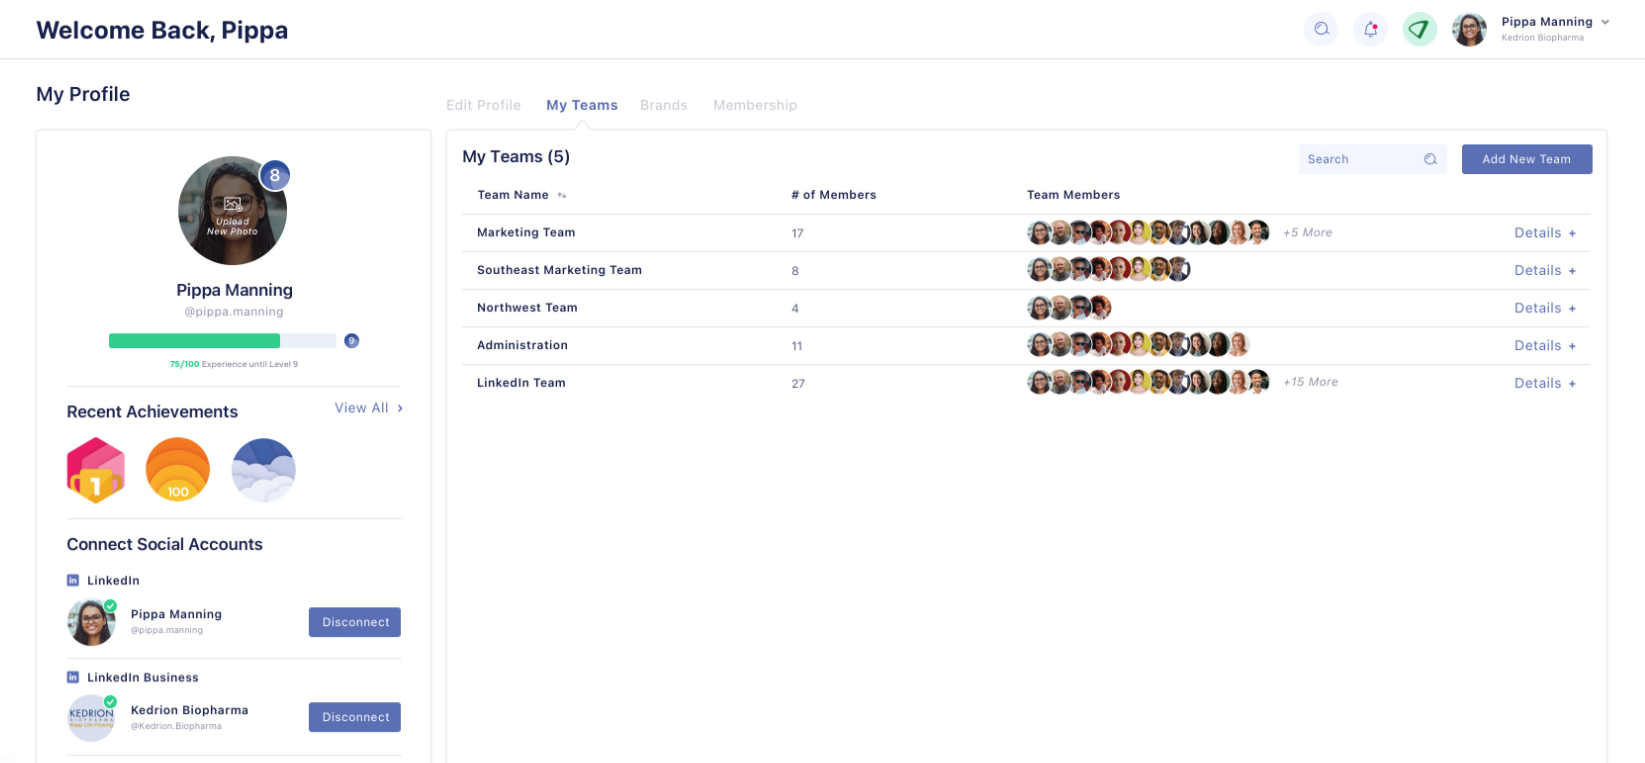
Once you've created some contacts, you'll be able to create your teams in the My Teams section using the Add New Team button. Teams are contacts you group together to make sharing content with others easier. All you need to do to create a team is to input the team's name and choose which contacts you wish to be part of the new team.
Once a team is created, the newly formed team appears in the table below alongside any other teams you may have already made.
Tip: If you would also like to sort through your My Teams quickly, you can click the top of a column to help change the order.

If you would like to view the team members and edit them, click the pencil on the right side of the row the team is in, and you'll be able to look at and change around who is a part of that selected them. Next to the pencil icon on the right side of the table, there's a trash can icon in case you ever want to delete a team that you've created.
Brands

If you're an Inphlu Teams subscriber, you'll have an extra section at the top called Brands. If you're a Teams user, you can manage multiple brands/accounts under your one main account, so this is where you would go to create new accounts/brands for you to manage. To further touch on brands and what they are, a brand is simply a Professional Inphlu account under the main Teams user/account umbrella.

Each brand has its unique profile picture, social media connections, and information, so when you use the Add New Brand button to create a new brand, there's a bit for you to fill out to get the brand up and running.

Once you have different brands created, they'll appear listed in the Brands section and can be switched between by clicking the profile picture of the brand you currently have selected.

Suppose you're interested in editing a brand, removing a brand, and changing the social media connections attached to a brand. In that case, you can click the pencil icon on the far right side of the table and get a pop-up similar to the one pictured above.
Membership

If you're the owner of the account you're using, you should see the Membership section, which allows you to switch your account with Inphlu and edit your billing information.

If you want to view the details for your current account with Inphlu, you can click on the Learn More button next to the type of account you have (the one marked with Current Plan).

If you're interested in learning more about the other types of accounts offered by Inphlu, you can also click the Learn More buttons next to them and see if they would be a better match for you and your current goals. If you like what you're seeing with another type of account on Inphlu, you can change it by simply clicking the Upgrade button in the pop-up.

Once you click the Upgrade button, you'll be taken to a pop-up similar to the Membership Checkout, which you may or may not have had to fill out earlier to start your account. When the checkout pop-up is filled out completely, you finalize the upgrade to the other account by clicking the Submit button.

Lastly, if you ever need to change the billing information for your account, click the Edit button under Edit Billing to see a pop-up that allows you to change your billing. Once you've updated your billing, click the Save button to keep the changes you made.
You've officially been through all of the Profile tabs now! Next up is the Storyboard tab!