
Learning and understanding the different parts of the onboarding guide so you can get started with Inphlu.
Summary
The onboarding guide will walk you through setting up the key parts of your account on the Inphlu platform so you can immediately begin creating and scheduling connect for your connected social media accounts.
Professional/Team vs. Enterprise
To get access to the onboarding and, in turn, the Inphlu platform, you'll either create an account as a Professional or Team user or have an account created for you as an Enterprise user.
Membership Checkout

Welcome Text

Welcome Email

If you create an account on Inphlu as a Professional or Team user, you'll have access to the onboarding as soon as you fill out and submit your account through the Membership Checkout.
If you have an account created for you on Inphlu as an Enterprise user, you most likely joined Inphlu via a text, email, QR code, or link being shared with you. By clicking or scanning these shared items, you'll immediately get access to the onboarding.
Once you get access to the onboarding, you'll be greeted by Step 1: Create/Review Your Account!
Page 1: Create/Review Your Account

For Step 1, you'll need to make sure the user information is correct and fill out any field that is still blank.
If you're a Professional or Team user, you should only need to fill out your Contact Number and agree to the Terms of Use and Privacy Policy.
If you're an Enterprise user, depending on how you were added, you may have to fill out the whole page or create a password and agree to the Terms of User and Privacy Policy.
If you need to change any information, you should be able to click on the pencil icon on the far right of the box or field you wish to change.
Once all of your user information is filled out and looks good to you, click the Create button to be taken to Step 2: Connect Your Socials!
Page 2: Connect Your Socials
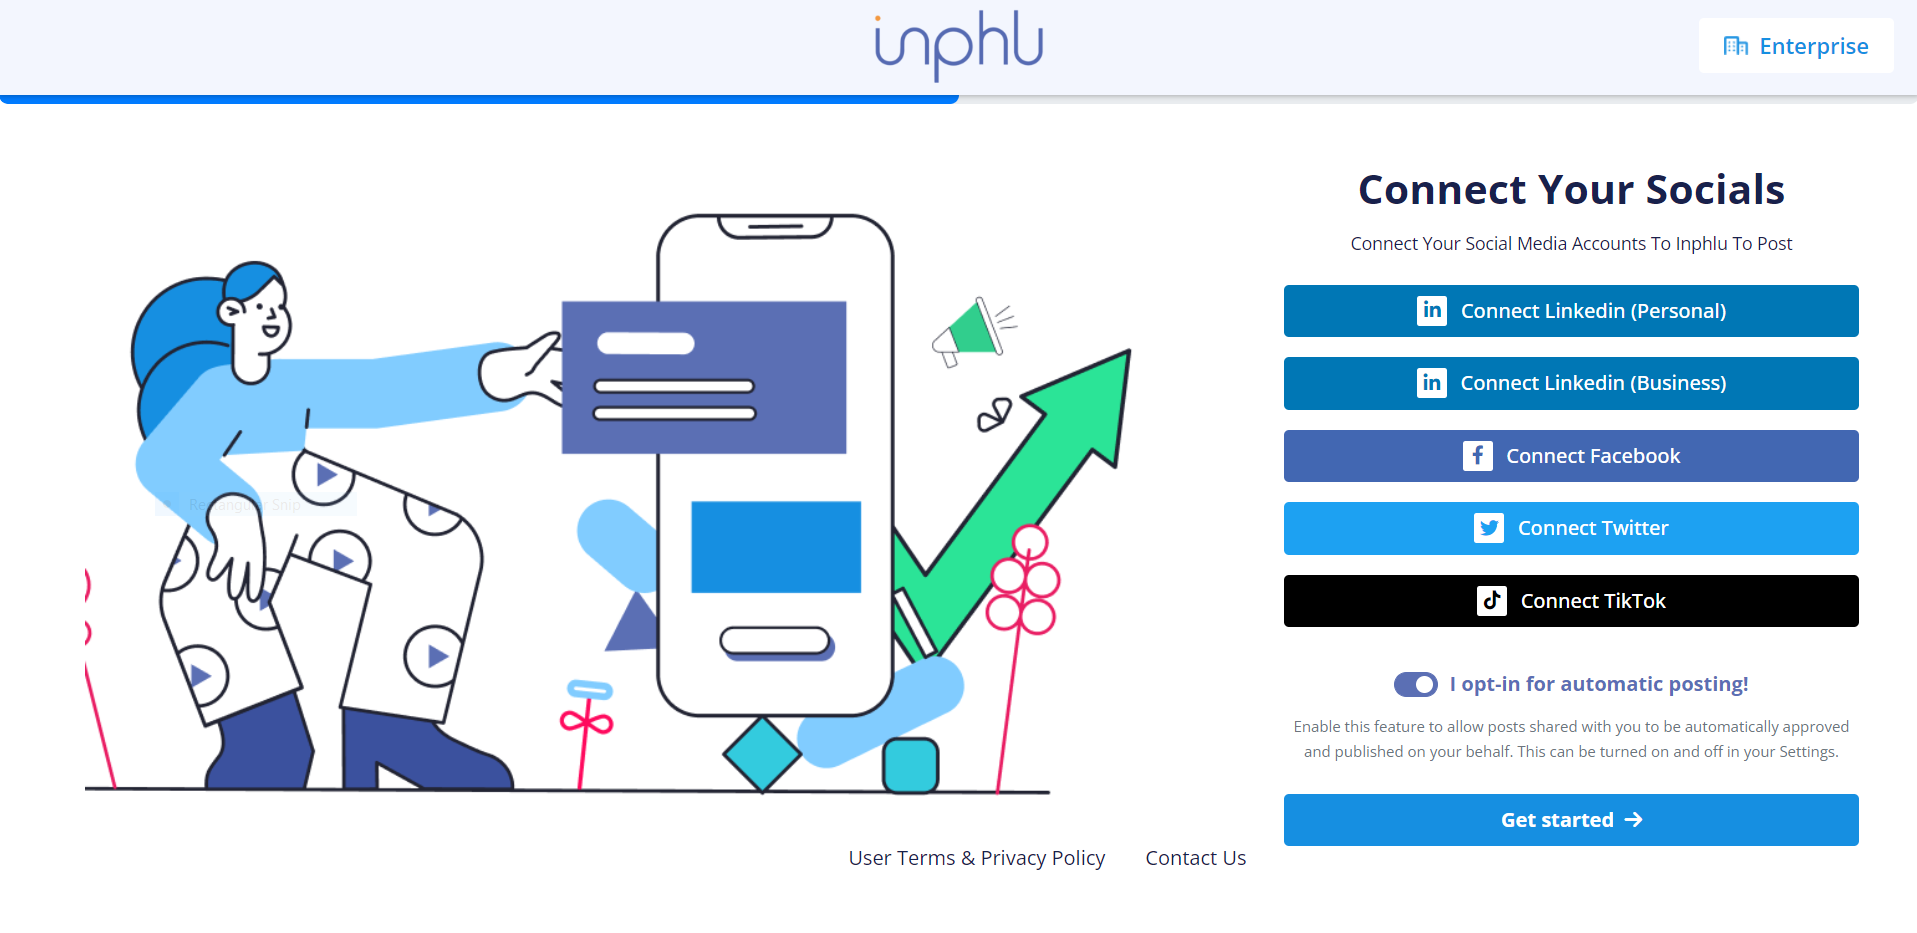
For Step 2, you will connect your Inphlu account to the various social media accounts you may have. Currently, Inphlu supports publishing content to Facebook business accounts, LinkedIn personal & business accounts, Twitter accounts, and Tiktok accounts.
If you're a Professional or Team user, you should have access to connect to every one of the various social media platforms that Inphlu has to offer.
If you're an Enterprise user, depending on what your organization has allowed, you may or may not have access to connect to all of the social media accounts offered by Inphlu. Also, you will have the option to opt out or opt in for automatic posting, which, when turned on, has all content shared with you automatically approved and published on your behalf. Of course, if you're unsure about this feature, you can always turn it off or on in your Profile tab.
To connect your social media accounts to Inphlu, click the social media platform you wish to connect to Inphlu and follow the login and permission prompts it has you go through.
Note: To connect a social media account to Inphlu, you must have an account already with that social media platform.
Tip: To make this Step easier and smoother for you, we suggest you already be logged into the social media account(s) you wish to connect to Inphlu. That way, you won't have to type out your email addresses and passwords as often.
Once you've connected all of your social media accounts, or as many social media accounts as you wish to connect at this time, to Inphlu, click the Get Started button to be taken to either Step 3: Share Your First Post or Step 4: All Set, depending on the account you're setting up with Inphlu.
Page 3: Share Your First Post

If you're a Professional or Team user, you can skip this section and continue to Step 4!
If you're an Enterprise user, you'll be taken to Step 3, which will have you approve or reject company content that your account's Enterprise management has already created and shared with you.
On the page, in the overview of the posts, you can see the captions and images or videos of the suggested posts, along with the social media accounts currently connected to your Inphlu account. Below all of that, though, you can find the green Approve button and the red Reject button, which you will use to signify if you like this post and would like to schedule it to be published in the future or if you think this post isn't quite the right match for you.
If there's a post that you like but would like to tweak to reflect you and your online voice more, you can click the gray Edit Post button located in the top right corner of the image/video in the overview of the post. In the Edit Post pop-up, you can add to or remove from any part of the post that you would like so that it reads differently, has a different look, or goes out on a date earlier or later than what is suggested. Once you're happy with how the post looks and reads, you can click save to make those changes.
After you've approved and rejected some, if not all, of the suggested posts in Step 3, you're ready to click the Confirm button at the bottom and be taken to Step 4: All Set!
Page 4: All Set
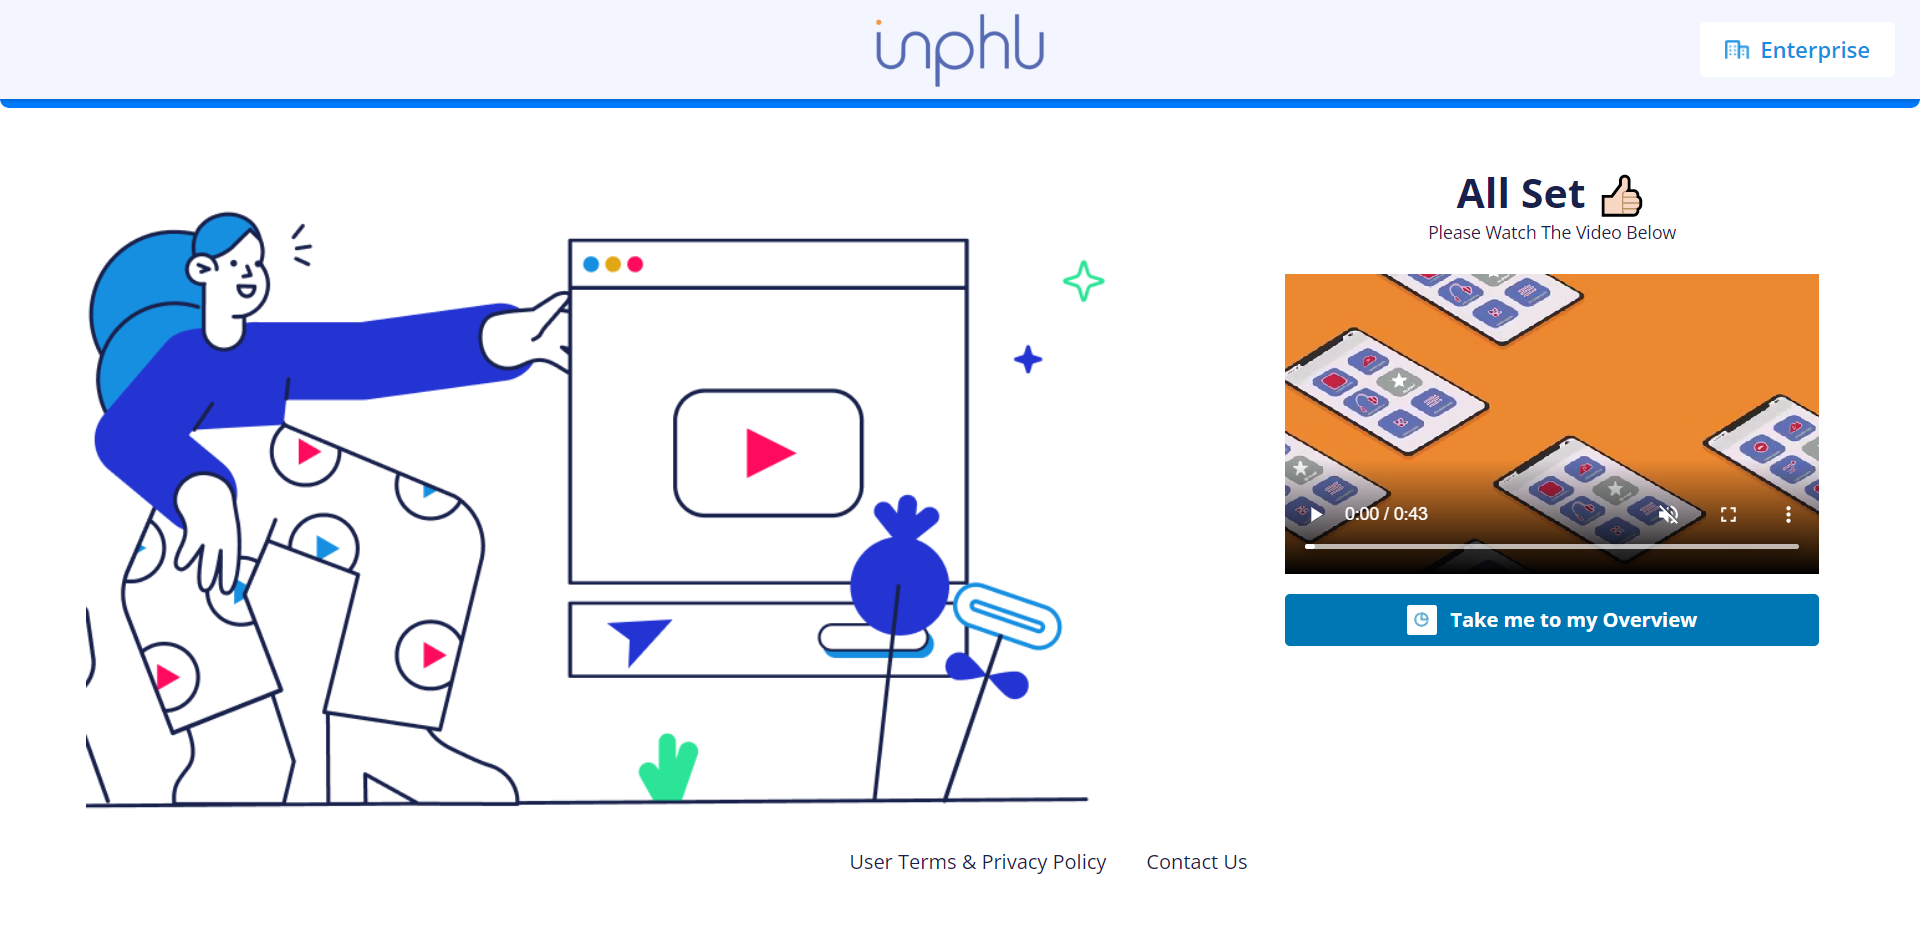
Once you've completed Step 4, you're almost done with the onboarding and ready to start using Inphlu!
No matter what kind of account you have with Inphlu, you'll be taken to Step 4 at the end of the onboarding process. In this Step, you only have two options: watch the introduction video and then go to the Overview tab of your Inphlu account or go straight to the Overview tab of your Inphlu account.
Either option you choose, you'll be taken to the Overview tab of your Inphlu account, which means that you're officially done with the onboarding!
The next page we'll look at is the Overview tab!